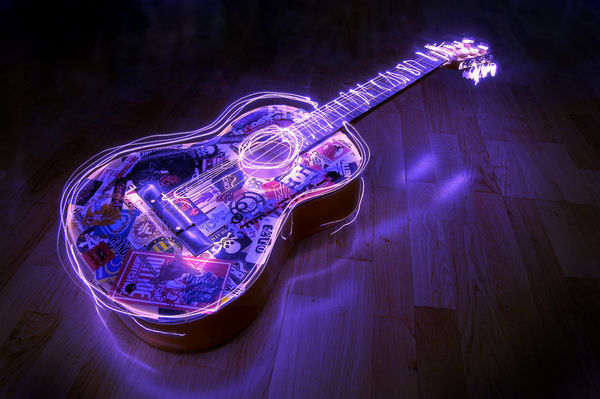
Ever tried shooting with light painting technique? if not you should try it. Shooting with light painting technique is very exciting and one of the creative use of shutter speed. In the light painting photography, we open the shutter in a long time (long exposure), shooting in the dark and directing directional light source (eg, a flashlight) at some point in a span object image along the shutter is open.
Photo technique light painting or light graffiti does not need a lot of costs, the main thing that distinguishes a good light painting photo and the mediocre are creativity and willingness to try. With this technique, we use as a light source like a painting brush.

The main objective photo technique of “painting with light” is that we illuminate some areas or points on the object so that only the illuminated area is only recorded in the photograph. Another creative use of light to form a unique pattern. All depends on your vision.
Some of the equipment needed to try Light Painting Photography :
- 1A camera with manual controls, especially those equipped with a bulb mode. This is necessary because the exposure time can be above 30 seconds. For example, car photo above is produced with 113 seconds
- a tripod
- Light source: flashlight, external flash, the lamp of learning, electric torches, candles, etc. according to taste. More diverse sources of light and color selection more and more creative options.
- Shutter release, or if not a friend who willingly pressed the shutter button
Photo Light Painting: Trial First
Photo light painting can be achieved in many ways, but if you are a first time try following some initial steps that can be followed:
- Find a dark place. You can try it in a room with the lights turned off. If you try it outdoors, try no other light source into the photo (indeed tdak need but for the beginning to make it easier).
- Determine the object that you want illuminated, and define how you will shine.
- Another alternative is to shoot the pattern of light source: you can use a flashlight to write words or imitate a particular form.
- Set the camera in bulb mode position,
- Use a moderate aperture. Between f / 4 to f / 8 is a good starting choice.
- Use a shutter release cable and key in the lock position, if you do not have a cable release looking for friends who want to press the shutter button corresponding exposure time required.
- Now begins using a light source to illuminate some point / area object image or start making a shape according to your wishes earlier.
- You try not to stand between the light source and the lens, if the light from the lamp to the lens is blocked by your body then the images will appear there in silhouette.
- Try to radiation are between one point to another at the time that the images appear smoother.
- After the completion of ‘painting’, release the shutter button (or cable release).
- See the photo end result, if you are not satisfied with the final image, repeat again. Sometimes it takes several attempts to determine the exposure time is a good fit with the strength of your light source.

F / 4, 240 seconds, bulb. note that the two models above should move from one point to another
Experiment Is The Key
Rather difficult to find an appropriate exposure time in bulb mode with just one trial, so if the first picture looks ugly repeat again and adjust the time. You can use a timer to determine the most appropriate time bulb. Do not forget to also try varying light sources. Try some light source color: red, blue, yellow etc. Try to vary the object image
